Tools and Pans
Baking can be a simple matter of using your imagination, a spoon, and a bowl to create everything from brownies to bread. There is almost no end to the array of tools (some say "toys") that a baker can accumulate. Knowing how to select the best tools for your baking can save you a lot of time and money.
Our test kitchens work over hundreds of tools every year, poking, dropping, and trying to scratch, break or otherwise abuse just about every tool in the marketplace. Here's what we've learned from using all those funny whisks, trying every shape and surface imaginable for a mixing bowl, and baking in every pan—assessing it for size, durability and ease of release—that comes our way.
Baking Pans
Baking pans are typically made from aluminum (an excellent heat conductor), or an aluminum-steel combination. Less common are stainless steel pans; while easy to clean and non-reactive, they don't conduct heat as well as aluminum. We've found silicone pans to be best for sweet baked goods, whose sugar helps them brown; baked goods low in sugar or fat (e.g., hearth breads) baked in a silicone pan don't brown well.
Other common materials for baking pans include glass, ceramic or stoneware. On the plus side, these pans are often lovely to look at, and a clear glass pan allows you to see how well the crust is browning as the product bakes. On the minus side, ceramic or stoneware doesn't conduct heat as quickly as metal pans. If you're baking something where precise temperature isn't critical (bread pudding or pie), they're a perfectly acceptable choice. Glass pans are slower to transfer heat, but retain that heat for longer, which can cause edges and bottoms of baked goods to become hard and overdone by the time the center cooks through. We recommend you reduce your oven's temperature 25°F when using a glass pan.
Baking pans are often coated with a non-stick surface. This is usually helpful, but also means you shouldn't cut baked goods in the pan, unless you use a special non-stick-safe knife or server. Angel food pans should not have a non-stick surface, as the baking batter actually needs to "climb" up the wall of the pan in order for the cake to rise.
Look for pans that are sturdy, but not so heavy that they're hard to handle. When a recipe calls for a 9-inch round pan, it means the top inside measurement should be 9 inches. Many manufacturers cut corners and make their pans 9 inches from edge to edge, but only 8 3/4 inches (or less) inside. This makes a difference in whether the pan can hold a recipe comfortably. This is particularly true with pie pans.
Loaf pans
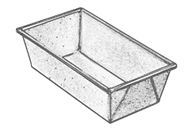
To make a sandwich loaf using a recipe calling for 3 to 3 1/2 cups flour, use a pan that measures 8 1/2 x 4 1/2 x 2 1/2 inches. For a recipe calling for 4 cups of flour, use a 9 x 5 x 2 1/2 inch pan. Using the proper size pan will give you a nicely domed loaf; using a pan that's too big will yield a loaf that's flat across the top.
Pain de Mie or Pullman Pan
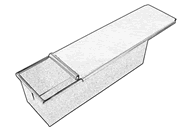
A pain de mie or pullman pan, usually 13 x 4 x 4 inches, is a straight-sided loaf pan with a flat sliding cover. Holding a recipe made with about 4 1/2 cups of flour, it will produce a very fine-textured, flat-topped bread, perfect for sandwiches.
When making sweet breads, use a light-colored pan, to keep the bread's crust from burning. When making bread without a significant amount of sugar (e.g., 1 1/2 tablespoons of sugar or less per cup of flour), use a dark-colored pan, to promote good browning.
Covered stone bakers
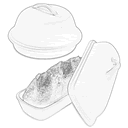
For extra-crisp hearth-type loaves, choose a covered stone baker. Shaped to hold round or baguette-type loaves, a covered stone baker will draw moisture from the bread as it bakes, producing a crunchy bottom crust. In addition, while that moisture is drawn off during the initial part of baking, it collects as steam inside the covered pan, keeping the bread's upper crust soft, so that it can rise to its fullest. Once the steam has dissipated into the oven, the upper crust becomes crisp as well.
Shaped pans
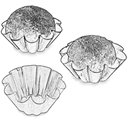
There are a variety of pans on the market designed to shape and hold particular loaves. Included in this group are pans for baguettes (double and triple); Italian loaves (usually double); breadsticks; and Italian sandwich rolls (4 to 5 rolls). These pans are usually perforated, allowing for air circulation for a crisp crust. Other shapes include pans for hotdog and hamburger buns; brioche; panettone; and sticky buns or cinnamon rolls. These pans aren't perforated, as the goal is a soft crust (and, in the case of sticky buns, no leaks!)
Pizza Pans
Pizza pans are usually made of dark metal, either anodized aluminum, or, less common, blue steel. Both of these materials transfer heat quickly and thoroughly, and if there's one thing every pizza needs, it's high heat, delivered quickly. An exception to this is porous (unglazed) stoneware pans. Because of their ability to draw moisture from the dough, they'll make pizza crust every bit as crisp as a dark metal pan. Another alternative is to cook pizza directly on a preheated baking stone.
Pizza pans are available in 12- and 14-inch round size, both deep-dish and thin-crust versions; in individual deep-dish pans (about 6 1/2 inches wide, usually sold in a set of four); and in 13 x 18-inch rectangular. You can find them perforated, or solid bottom; we prefer a perforated pan, which we set directly on a preheated baking stone. Don't purchase a non-stick pizza pan; you're sure to injure the finish eventually by cutting in the pan. Instead, make sure there's a good film of olive oil in the bottom of the pan before you add the dough.
Unless you're making a Chicago-style deep-dish pizza, which requires a 12- to 14-inch round pan at least 2 inches deep, your pizza pan doesn't need to be very deep. In fact, a flat, rimless, perforated pizza disk is the top choice for some, as it allows the oven's heat to reach all parts of the pizza.
A typical pizza crust recipe calling for 3 cups of flour will make two thin-crust 12-inch pizzas; or a thick-crust 14-inch round or 13 x 18-inch (half sheet pan) rectangular pizza; or four medium-crust 6 1/2- to 8-inch individual pizzas.
Cookie sheets
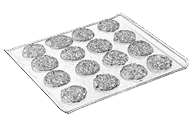
Flat metal sheets designed to hold rows of baking cookies come in a variety of sizes and finishes. Purchase a cookie sheet that optimizes the size of your oven. For best heat circulation, it should have a 2-inch clearance on all sides when set on the oven rack. Make sure the sheet is substantial enough that it won't warp or buckle at high heat, or develop hot spots.
Light-colored, shiny cookie sheets will produce cookies much less likely to burn. Non-stick sheets are often black, and for this reason we don't recommend non-stick cookie sheets, unless their coating is no darker than light gray to gray. (If you already have a dark-colored, non-stick cookie sheet, and it tends to burn the bottoms of your cookies, reduce the oven temperature by 25°F.) If you have trouble with cookies sticking (and many cookies don't stick even on an ungreased pan, due to their high fat content), we recommend using parchment or a pan liner.
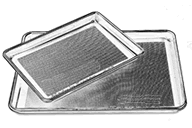
Insulated cookie pans make it very hard to burn the bottom of your cookies. However, since they are very poor heat conductors, they also make it hard to bake your cookies at all; cookies baked on insulated pans tend to bake so long before browning that they dry out.
There is a pan made specifically for biscotti's first bake, a shallow aluminum loaf pan, 12 x 5 1/2 x 2 inches. While not entirely necessary, it helps shape the dough into a log, prior to cutting it in slices and baking it again.
Quick loaf pans
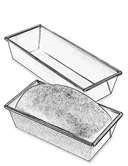
Most quick loaf recipes (banana bread, zucchini bread) are written for 9 x 5 x 2 3/4-inch pans, a traditionally shaped loaf pan that's just slightly larger than a yeast bread loaf pan. Caveat emptor:
Using a yeast loaf pan for a quick bread recipe may result in batter overflowing the pan. Likewise, using a quick bread pan for a yeast loaf recipe may result in a loaf that doesn't dome. These pans, though similar in size and shape, are not interchangeable. Quick loaves also can be baked in a longer, narrower pan (about 12 x 4 x 2 1/2 inches).
Since quick loaves bake for a long time (close to an hour, or more), feel free to use a stoneware, glass, or ceramic pan, as the quick transfer of heat a metal pan gives isn't as essential as it is with other baked goods, such as cookies.
Scone pans
While scones are often made freeform by cutting a circular round of dough into wedges; or cut with a biscuit cutter, the scone pan, with its eight wedge-shaped wells, forms beautifully shaped scones. Unless scones are very sweet (not generally the case), a dark pan will give them a lovely brown crust during the very short time they spend in the oven.
Popover pans
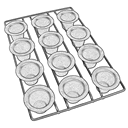
Popovers demand a pan with specially shaped cups, in order to attain their full height. Sized in regular (to make six large popovers) or mini (to make 12 smaller ones), popover pans feature deep, narrow wells, which force the baking batter to rise up and then out (rather than flatten), producing the typical popover shape. Popover pans made of dark metal will produce the best crust.
Muffin pans
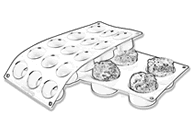
Muffins range from mini to maxi, with assorted shapes spanning the range, and pans come in a variety of shapes and sizes. A standard muffin pan has 12 wells, each measuring about 2 1/2 inches wide at the top, and 1 1/2 inches deep. A pan with wells significantly smaller than that won't hold a standard-size muffin recipe. A mini-muffin pan includes 24 wells, each about 1 3/4 inches wide and 1 inch deep; it will hold a standard muffin recipe, as will a jumbo muffin pan, with six wells about 3 3/4 x 2 inches deep each.
Muffin pans are traditionally made of metal, most commonly aluminum, but can also be found in stoneware and, most recently, flexible silicone. We've found the stoneware pans don't brown muffins as well as metal as they're too slow to absorb heat. Silicone pans are naturally non-stick (but we still recommend greasing them), and their flexibility allows you to gently "pop" muffins out of the pan without damaging them. This type of flexible pan must be set on a cookie or baking sheet before being put into the oven.
Pudding steamers
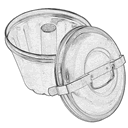
Also known as pudding molds, these aluminum or tinned steel tube pans often come with a clip-on lid, to keep the baking pudding moist. The pan, which comes in 1-quart or 2-quart sizes, is filled with the batter for a steamed bread (Boston brown bread) or pudding (Christmas puffing). The lid is clamped on, and the pan is set on a rack in a kettle of simmering water a couple of inches deep, where the bread or pudding steams for 1 to 3 hours, until it's cooked through.
Crêpe pans
A shallow, flat-sided sauté pan is helpful in making crêpes. Most crêpe pans are made of cast iron, heavy aluminum, or carbon steel, as these metals heat evenly and quickly, without hot spots. Crêpe pans can be non-stick, but it isn't crucial; crêpes cook in a film of butter and slide out of whatever pan you choose. Sizes range from about 4 inches to about 10 inches, with the smaller crêpes suitable for dessert, the larger ones perfect for entrées.
Cake pans
Nearly all cake pans are made from light-colored aluminum, as cakes need quick, steady heat to rise correctly. Some cakes (pineapple upside-down cake, cobbler) were traditionally baked in a cast iron "spider," a round, medium-depth skillet. Cast iron is still a useful way to make any type of cake that includes a melted or cooked layer atop which batter is poured; cast iron is very happy to go from stovetop to oven, unlike many types of cookware.
Layer cake pans
Baking a birthday or wedding cake? You'll probably want a set of round layer cake pans; our material of choice is light-colored aluminum. Layer cake recipes nearly always call for 8- or 9-inch pans; to assure batter won't overflow, choose pans that are at least 2 inches deep, and fill them with no more than about 5 to 6 cups of batter.
Sheet cake pans
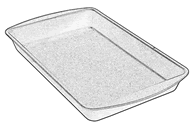
When you choose to bake a single layer sheet cake, you'll nearly always use a 9 x 13-inch pan. Some smaller cake recipes call for a 9 x 9-inch pan. Again, either one should be at least 2 inches deep. For best cleanup, look for pans whose inside corners are slightly rounded, to avoid trapping crumbs in crevices. A 9 x 13 x 2-inch pan shouldn't be filled with any more than 12 cups of batter; 10 cups is safer, though you can go to 12 with dense cakes that don't rise much.
A typical cake recipe will fill two 9-inch round pans; two (thick layers) or three (thin layers) 8-inch round pans; a 9 x 13-inch pan; or make 24 standard-size cupcakes. If you've got a collection of odd-sized pans, and don't know how they match up to these standards, just do your math. A 7 x 11-inch pan (77 square inches) or 10-inch round pan (79 square inches) are both roughly equivalent to a 9 x 9-inch pan (81 square inches), assuming all are the same depth.
Springform pans
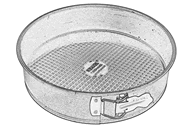
For delicate tortes and cheesecakes, streusel-topped cakes, or any time you want to remove a cake from its pan to serve (but not upend it in the process), the springform pan is your best solution. They are usually round, and available in lots of sizes, from about 4 1/2-inches in diameter to 12 inches. The flat bottom is surrounded by a 2 1/2- to 3-inch tall removable locking sidewall. Less expensive springform pans are prone to leaks. When purchasing one, examine how tightly the walls lock onto the base when fastened into position.
Bundt-style, tube, and angel food pans
These pans are the choice for angel food cake, or to bake a cake that looks fancier than a layer or sheet cake. Generally 8 1/2 to 10 inches in diameter, and featuring an 8- to 12-cup capacity, bundt-style pans are usually non-stick aluminum or aluminum-steel, with the occasional glass or tinned steel pan available as well. For single-serving cakes, plaques featuring four or six small bundt-style wells are available. The similarly sized tube pan has plain (rather than embossed), slightly flaring sides.
An angel food pan is a tube pan with some special features: it should not be non-stick; and it should include either "feet" (small posts attached to the top rim; be sure they're at least 2 inches long), or a tube wide enough to fit comfortably over the top of a glass bottle, such as a wine bottle. Angel food cakes attain their maximum height by cooling upside down, either on the shoulders of a bottle, or resting on the pan's feet. While not as intricately shaped as bundt-style pans, these pans come in various shapes, including round, square, and flower. Choose one that's at least 4 inches deep, 9 to 10 inches wide, and has a minimum 10-cup capacity.
Specialty cake pans
Want to bake an Easter lamb or bunny, a jack-o'-lantern, or Santa? These shapes and many more are available as cake pans. While classic two-piece Easter lamb or rabbit pans are made of heavy cast aluminum, without a non-stick coating, most other specialty pans are lightweight aluminum; the more intricately designed they are, the more you'll appreciate them having a non-stick coating.
To make filled "tunnel" cakes, use a set of pans specifically designed for that purpose. These come in various shapes, usually round.
Pie & tart pans
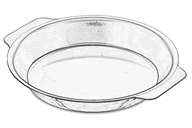
For variations in size, shape, and composition in the world of baking pans, there's not much that beats the pie pan. From tiny tartlets to "mega-pies" (think four and twenty blackbirds), from aluminum, tinned steel, or hand-painted ceramic to unglazed stoneware, clear glass, or flexible silicone, pie pans cover a lot of ground.
Traditional pie pans
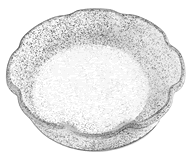
Most pie recipes are written to fit a 9- or 10-inch wide, 1 1/2-inch deep pie. Beware pie pans that are much shallower than 1 1/2 inches; while 1 1/4 inches is barely acceptable, a 1-inch-deep pie pan will not hold a typical size pie filling. For deep-dish pies, choose a pan that's 1 1/2 inches to 2 inches deep, with 2 inches the preferred depth. A 9-inch pie pan should hold 4 to 10 cups of filling. Why the wide variation? Because while 4 cups of pumpkin filling will expand just a bit, 10 cups of raspberries will shrink enormously. Both amounts (or anything in between) can make a nice-looking pie.
Smaller diameter pans (4 3/4 to 5 inches) are ideal for individual serving or savory "pot pies." Pot pie pans, usually ceramic, have more gently sloped walls than individual pie pans (usually made of aluminum, and sold in sets of 4), which flare from bottom to top quite dramatically. The straighter walls of the pan give pot pies a greater ratio of filling to crust.
Dark-colored metal pie pans tend to become hotter, and transfer heat better, than ceramic pans, and for that reason brown crust more quickly, a plus in pie-baking (where a pale, soggy bottom crust is the inexperienced baker's nemesis). However, most pie pans will brown a crust thoroughly, given enough time; and, in the case of many pies (e.g., fruit pies), extending baking time beyond what the recipe says isn't a problem, so long as you cover the pie's exposed edges with a crust shield to prevent burning. We've forgotten pies in the oven sometimes, and even after 2 hours they've emerged happily bubbling and beautifully browned.
The advantage of stoneware or ceramic dishes (pans) is their beauty. Thanksgiving, a dinner party, or anytime you're seeking a fancier touch, choose a handsome colored or painted ceramic pie dish instead of utilitarian metal. Clear glass dishes, the ones so many of us grew up with, allow you to see when the bottom crust is sufficiently browned.
Tart pans and quiche dishes
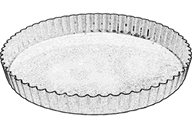
Tart pans, usually fluted, shiny tinplate, shaped round, square, or rectangular, often feature a removable bottom, very handy for removing the tart from the pan without harming the appearance of the crust. Because they're usually only 1 inch deep, tarts will have a greater ratio of crust to filling, an appropriate balance considering tart fillings often include pastry cream or some other very rich confection.
Mini-tarts or mini-quiches are easy to make with a tartlet plaque, akin to a muffin pan but with 1- to 3-inch shallow wells, sometimes fluted. Pastry is pushed into the wells with a tart tamper (a wooden dowel with a flattened ball at one end), then filling is added. Some tartlet plaques are made of flexible silicone, which is a big help in turning out the tartlets, but the pastry doesn't brown as nicely as it does in a metal pan.
The classic French quiche dish is usually round, ceramic, and about 10 to 11 inches in diameter, 1 to 1 1/2 inches deep. Most quiche dishes have fluted sides, and unlike pie pans, the sides are straight, not slanted.
While you can make yeast bread dough using nothing more than a bowl, measuring cup, and your hands, there are a number of tools to make your life much easier. Choose the ones you feel will help you the most.
Yeast Bread Tools
While you can make yeast bread dough using nothing more than a bowl, measuring cup, and your hands, there are a number of tools to make your life much easier. Choose the ones you feel will help you the most.
Kneading mat
The non-stick surface of a silicone kneading mat makes dough-kneading easy, and cleanup a snap. Mats range in size from 8 x 11 inches to about 16 x 24 inches; the larger the mat, the more room you have to let the flour fly. Caution: be sure to use only a plastic dough scraper on these mats, as metal will cut their surface.
Baker's bench knife
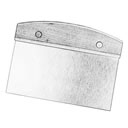
Use a bench knife, a 6-inch long rectangle of stainless steel with a handle across the top, to divide dough into pieces, or to scrape bits of dried dough from your countertop.
Shaping baskets and couche
European-style hearth loaves are traditionally given their second rise in shaping baskets, before being turned out onto an oven stone to bake. The French banneton, a willow basket lined with linen or canvas, comes in the same shapes as French breads, including boule, batard, and baguette. The cloth lining, which is floured before use, draws moisture from the dough as it rises, making the baked bread's crust chewy. Most times, when making baguettes French bakers let their shaped loaves rise in a linen couche, a rectangular piece of cloth that can cradle multiple rising baguettes in its folds.
The German brotform, made of a coil of wood, gives German bread its classic beehive shape; the basket is heavily floured, and when the risen loaf is turned out onto a stone or pan, it retains the circular marks of the flour.
Rising buckets
Often bakers let dough rise in a lidded rising bucket, a 4- to 6-quart acrylic or plastic bucket with measurements on the side, making it easy to judge when the dough has doubled or tripled in size. The lid keeps the dough moist, allowing it to rise fully.
Lame
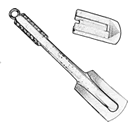
A curved razor blade set into a handle is called a lame (lahm), and French bakers use it to slash the top crust of risen country loaves (most famously, baguettes). The slash allows the bread to expand fully to its proper shape as it bakes. A small, very sharp paring or serrated knife can be substituted.
Baker's peel
Also known as a pizza peel, this beveled-edge square of flat wood with a handle (or square of aluminum, with a wooden handle) transfers large, flat loaves or pizzas from work surface to hot baking stone. If your dough sticks to the peel, put a piece of parchment paper on the peel, place the dough on the parchment, then slide both parchment and dough onto the stone; the parchment won't undermine the stone's ability to produce a crisp crust.
Baking stone
A baking stone, placed on the bottom shelf of your oven, is a wonderful surface for baking pizzas and hearth breads. The porous stone draws moisture away from the crust as it bakes, yielding a crisp, crunchy crust. The immediate contact between dough and hot surface helps bread with its oven spring. Select a baking stone that's at least 1/2 inch thick; thinner stones may crack. The stone's dimensions should mirror your oven rack's, leaving 2 inches of clearance on all sides for heat circulation.
Kitchen Gadgets
Pizza wheel
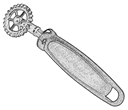
Also known as a rolling pizza cutter, this sharp wheel, with handle, makes short work of cutting bread sticks from a rectangle of unbaked dough. It's also useful for cutting crackers, the strips of pastry for a lattice pie crust, fettuccine from fresh pasta dough or, of course, slices of pizza.
Tongs
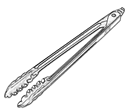
Choose heatsafe metal tongs, with a heatproof handle, that lock closed; they're easier to store. If you're turning bagels or doughnuts in boiling water or hot oil, choose tongs with a flat, smooth underside; many tongs are manufactured in a folding process that leaves a perfect channel for water or oil to funnel through. When you lift this type of tongs, boiling oil or water is delivered directly to your wrist. OUCH.
Flour tools
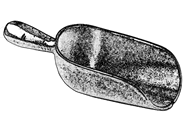
Sifting aerates flour, giving many types of cake a head start, and making the measuring process more accurate. When a recipe calls for sifted flour, it's important to sift the flour before measuring it. When "flour, sifted" is called for, the flour should be measured first, then sifted.
Canister flour sifters, the most familiar kind, come in a variety of types and materials, including crank, shake, and electric, and aluminum, stainless steel, and plastic. Since sifters don't need to be washed-any spills or smears on the outside can be easily wiped off-there's no need to worry about dishwasher safeness. Choose a flour sifter with a minimum 3-cup capacity; any less than that, and all but the smallest amount of flour will tend to overflow when you start to sift it.
Many bakers no longer bother to sift flour. But even though the flour bag says "pre-sifted," that doesn't mean the flour shouldn't be aerated before using. Flour in the bag has settled during shipment, and to measure correctly it needs to be fluffed up. A flour scoop-cast aluminum, wood, stainless steel, or plastic-is used to stir and fluff the flour, then gently sprinkle it into a measuring cup. Choose a flour scoop with a straight edge long enough to sweep the excess flour off the top of your dry measuring cup in one even motion.
Potholders and oven mitts
When you're pulling hot cookie sheets and cake pans out of the oven, it's critical to protect your hands. Don't rely on a handy dishtowel, because at some point you'll pick up a wet towel, grab a hot pan, and drop the pan on the floor as soon as the water in the towel turns to scalding steam.
Potholders or mitts are made from quilted cotton (least protection), suede or thick terrycloth (better protection), or a pricey combination of heatproof fabrics, with or without steam-proof liners (best protection). Flexible silicone mitts and holders are also available; they're a snap to wash, and their protection is comparable to that of terrycloth. But don't think because they're waterproof you can plunge your hand into boiling water and leave it there; it's OK to snatch a simmering bagel or steaming ear of corn out of the pot, but prolonged exposure to boiling liquid will heat the silicone (and your hand) to uncomfortable levels.
Spatulas
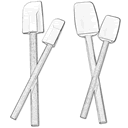
Spatulas are used to scrape cake batter off the sides of the mixing bowl, spread filling onto cinnamon bun dough, or any number of baking tasks. They are made of heat-resistant silicone so they also can be used to stir custard, scramble eggs, or turn doughnuts in a deep fat fryer. A spoonula is simply a spatula whose blade has been made spoon-shaped; not only can it be used as a spatula, it can also be used as a spoon, to beat batter, or scoop (rather than scrape) it into a pan.
Dough or bowl scraper
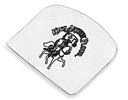
With one straight edge and one curved (it looks like a squared-off circle), a flexible plastic bowl scraper is useful for everything from sweeping all of the batter out of the bowl in one scoop or cutting cinnamon bun dough to scraping bits of piecrust off the counter, crumbs into the wastebasket-or ice off your car windshield. Choose one that's flexible enough to curve easily to the shape of your bowl.
Whisks
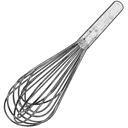
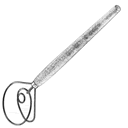
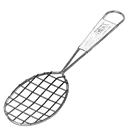
One way to aerate flour, besides sifting or fluffing, is to gently beat it with a wire whisk, a series of looped wires fastened into a handle. A dough whisk, also known as a brodpisker, is a long, wooden handled, stainless steel whisk ideal for mixing bread dough, even stiff ones.
A cake whisk has a flow-through blade that beats a lot of air into cake batter but can also be used for mixing muffins just enough to moisten the batter.
Pastry brushes
Pastry brushes are essential for brushing a loaf of hot bread with crust-softening butter; brushing egg wash onto breadsticks or bagels; egg white onto the edges of turnovers, or milk onto a pie crust.
Parchment paper
Parchment paper is the traditional pan liner; made of silicone or vegetable-oil coated paper, it's greaseproof and non-stick. It can be used more than once, but isn't as long-lasting as silicone or flexible fiberglass pan liners, which can be washed and reused hundreds of times. Parchment comes in sheets sized for half-sheet (13 x 18-inch) and full-sheet (18 x 26- inch) baking pans; in rolls; and in sizes and shapes for particular pans, such as 9-inch rounds for layer cake pans, or rectangles for quick loaf pans. Pan liners come in fewer sizes and shapes.
Parchment also comes pre-cut in triangles to make pastry cones, used for piping decorations onto cakes.
Cooling racks
Why is it important to cool fresh-from-the-oven baked goods on a rack? Because if cooled on or in a pan, the crust can become soggy, due to condensation. Racks are also helpful when you're drizzling icing or chocolate atop pastries, and don't want them to end up in a sweet puddle.
Handy innovations include racks that fold for storage, and tiered racks, set atop one another, which save counter space.
Bowls
The baker's most constant friend is her bowl. Bowls range in size from tiny, 1-tablespoon ingredient bowls, to 2-gallon (or larger) bowls perfect for mixing up a triple yeast bread recipe, or holiday fruitcakes.
Consider a variety of factors when choosing bowls. Will you be melting butter or warming milk in a microwave? Choose a microwave-safe bowl. Whipping cream in a chilled bowl? Choose stainless steel or copper (copper is especially good for whipping egg whites into meringue). Making a lot of yeast bread? Choose a crockery bowl, which will stay warm as the dough rises.
A final factor to consider is weight. Extra-large crockery bowls are very attractive, and are usually oven-safe, but before purchasing decide whether you're strong enough, and have a good enough grip, to maneuver them around the kitchen. Acrylic bowls come in fun colors, and they're lightweight and easy to handle, but some aren't microwave-safe. Stainless steel bowls are a good all-around choice, but if they're lightweight enough to handle easily, they'll also dent just as easily. Whatever material you choose, a set of bowls-approximately 2-, 4-, and 6-quart-is most useful. Add a larger bowl, if you like, for the occasional big baking job.
Bread knives
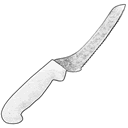
A good bread knife should be a part of every bread baker's arsenal of tools. A bread knife should be serrated, and will work best on anything from a chewy-crusted hearth loaf to soft white sandwich bread. The blade should be 8 to 10 inches long, made of high-carbon stainless steel (which sharpens better than regular stainless steel), and should feel balanced and comfortable in your hand. To preserve the knife's blade, hand-washing is a good choice; particularly if the knife has a wooden handle, drying it after washing is also good practice.
An offset bread knife, shaped like an offset spatula with the blade set below rather than even with the handle, allows you to slice all the way to the bottom of the loaf without rapping your knuckles on the breadboard. While not critical, it's a handy design feature.
Cake tester
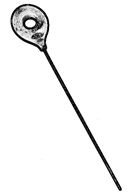
Remember Mom pulling a straw out of the kitchen broom to poke into the center of her baking cake, to see whether it was done? If the straw came out clean, the cake was ready. Choose one that's thick enough that you can easily see whether or not it's coated with batter after withdrawing it from the cake; but not so thick it leaves a noticeable hole.
Turners
For flipping flapjacks or transferring cookies from pan to cooling rack, a good turner is essential. Choose one with a wide enough blade to handle your favorite size pancake on the griddle, but not so wide that it's not maneuverable around cookies lined up on a cookie sheet; around 3 inches is a good compromise. A bevel on the end of the blade is useful for getting underneath thin cookies.
Graters
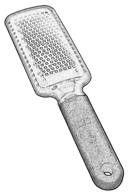
Looking very much like a wood rasp (in fact, that's the design they're based on), the plane grater does an excellent all-around job on cheese, chocolate, garlic, citrus peel, or anything else you can "grip and grate." Ranging from long, thin, fine-blade graters to wider graters with blades ranging from extra-fine to coarse, these graters are easy to use, sharp and efficient, and easy to clean. We prefer them to the standard box grater.
Another option is the rotary grater, a rotating drum gripped inside two handles. Just insert bits of chocolate, cheese, or nuts, and crank. The advantage of this grater is its safety and speed; the disadvantage is its small capacity.
Zester
When you need just a teaspoon or two of fresh citrus zest, use a zester, a simple stainless steel rod with a series of sharpened holes across one end. Simply scrape the zester across the orange or lemon with the same motion you'd use with a paring knife.
Storage
Bread bags
Storing bread at room temperature is best; refrigeration stales bread quickly. A plastic bag sized to fit your loaf is most efficient, and works best. For bread with a crisp crust, try to purchase perforated plastic bags; they protect the bread while letting it breathe. Plastic-lined cloth bread bags are attractive and reusable.
Ingredient storage
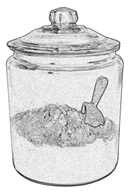
Flour and sugar are usually stored in lidded canisters. Choose canisters with an opening wide enough to dip a scoop into, and to hold a cup over to sweep off the excess.
Whole grains should be stored in the freezer, for best shelf life. Plastic jars with screw-on lids are a good option here; be sure to mark the jar with what's inside, or someday you'll find yourself trying to identify something brown and grainy by looks alone.
Cutters
Cookie cutters, stamps, and molds
Christmas and holidays such as Thanksgiving, Halloween, and Independence Day are marked by shaped cookies ranging from angels and trees to shooting stars, turkeys and black cats. These cookies are made by rolling out cookie dough (sugar or gingerbread are the traditional flavors), then cutting it with a shaped cutter.
Most cookie cutters are made of tin, plastic, copper, or copper-plated aluminum. All work equally well, though the tin ones, if particularly flimsy, will bend out of shape easily. Many bakers keep their copper cutters on display in the kitchen when not in use. Be sure any cutters you purchase are at least 1/2-inch deep, and that they have a sharp side (for cutting), and a dull side (for holding).
Pastry cutters are similar to cookie cutters in all respects except one: they're usually very small, ranging from 3/4 to 2 inches in size. They're used to cut shapes from pie crust (leaves and stars are typical) to decorate the top and edges of a pie.
Biscuit cutters
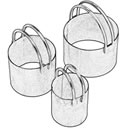
Biscuit cutters are key to producing high-rising biscuits; biscuits cut with a dull cutter won't rise well, as their sidewalls have been compacted rather than cleanly cut. Round biscuit cutters, made of tin, stainless steel, or plastic, usually come in nesting sets ranging from 1 1/2 to 2 3/4 inches in diameter. Be sure they're at least 1 inch deep, in order to cut through your thickest biscuit dough. Biscuit cutters (which also come in linked hexagons) can double as cookie cutters. In addition, we like to use biscuit cutters to cut small rounds out of a sheet cake, which we then ice and decorate to make tiny individual cakes.
Doughnut or bagel cutter
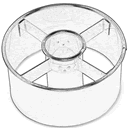
A circular cutter with a smaller cutter in the center, the doughnut (bagel) cutter is used to cut standard-size (3 1/2-inch) doughnuts or bagels. Make sure the cutters are aligned; when you press the cutter down on the dough, both should cut all the way through. Less expensive cutters may be out of alignment, making them frustrating to use.
Pastry Tools
Cake comb
The distinctive thin, parallel lines decorating the sides of a fancy iced layer cake are made with a cake comb, a comb featuring numerous thin, sharp saw-like teeth. The baker holds the comb in place against the side of the cake, then turns the turntable (just below) to make lines.
Cake turntable
For easiest cake decorating, invest in a turntable (akin to a lazy susan). Turntables come in expensive cast aluminum, or less expensive plastic. Some are elevated, some nearly flush with the counter; the elevated turntable raises the cake so it's easier to work with.
Cookie scoop
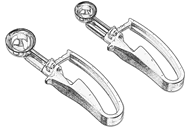
Also known as a disher or depositor, the cookie scoop is simply an ice cream scoop sized to deposit a traditional (“1 teaspoon” or “1 tablespoon”) ball of dough onto a cookie sheet, quickly and cleanly.
Choose a cookie scoop that's easy for you to squeeze; it'll keep your hand and wrist from tiring when you're making lots of cookies. If dough starts to stick in the scoop, simply wipe the interior clean, spray with a non-stick baking spray, and continue.
Dough docker
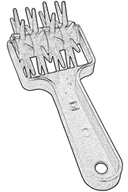
Looking like to a very small (3- to 4-inch) spiked rolling pin, the dough docker cuts even rows of holes into cracker dough, or thoroughly pricks the bottom of a tart or pie shell in a few easy swipes. Unless you're very particular about how your pastry looks, or you're doing lots of pastry that needs docking, a fork can easily substitute for the docker.
Flour wand or shaker
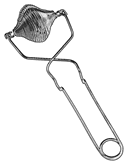
This old-fashioned tool is used to dust a work surface (or the top of pastry or bread dough) with flour. A ball of coiled metal is filled with flour, then the handle is squeezed to let just a bit of the flour sift out, exactly where you direct it. It's simple, accurate, and perfect when you want just a dusting, rather than scattered handfuls, of flour.
Icing spatula
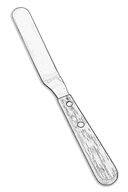
For icing cakes, use an icing spatula, a long, narrow, flexible stainless steel turner, one that follows the curve of the cake as it smoothes frosting around the sides, or can bend to create artful swirls on top. Icing spatulas are available straight, or offset, in an array of lengths; rounded on the end, or tapering to a wide point (for fine work). Choose a medium-size spatula that feels comfortable in your hand.
Muffin scoop
Big brother to the cookie or ice cream scoop, a muffin scoop dishes out 1/4 cup of muffin, cupcake, or pancake batter, easily, evenly, and quickly. Cupcakes or muffins will have smoother, rounder tops (and pancakes will be evenly sized) when they're deposited into the pan with a muffin scoop.
Pastry bag and tips
To shape the dough for éclairs or cream puffs, or to decorate a cake, use a pastry bag, a cone made of plastic-lined canvas, or single-use parchment or plastic. Batter or icing is spooned into the bag, then squeezed out through a decorative chrome-plated or stainless steel metal tip. Tips come in a huge array of designs and sizes; the beginning cake decorator does well to purchase a basic kit, which will include a bag, and about a dozen different tips and accompanying paraphernalia (couplers, cleaners, etc.)
Pastry blender or fork
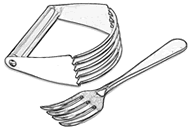
To combine flour and fat quickly and evenly when making pie crust, use a pastry blender, a series of parallel stainless steel wires or thin stainless blades shaped in a half-moon, with a handle on top. The baker gently chops down on the fat and flour (think of mashing potatoes with a hand masher) until the fat chunks are the desired size—large for flaky pastry, small for crisp pastry. A pastry fork, which resembles an oversized dinner fork with larger, thicker, wider-spaced tines, performs the same function.
Pastry wheel
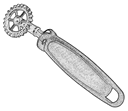
A pastry wheel is used to cut strips of pie pastry for a lattice-top crust, cut circles of turnover dough, or for any kind of dough-cutting chore. A standard pastry wheel resembles a miniature pizza wheel, with a circular blade that's only 1 1/2 to 2 inches in diameter. A deckle-edge wheel lends a zig-zag pattern to the edges of cut pastry dough. A sealing pastry wheel (also called a ravioli cutter) is designed to both seal and cut dough in one motion, useful for making ravioli or turnovers.
Pie crust shield
A pie crust shield—a round, flat piece of lightweight aluminum—replaces the crumpled strips of foil our mothers used to shield their piecrusts. Sized to fit a standard 9-inch pie, the shield sits very gently atop any fancy fluted edges; just be sure not to put it on till the edge has had a chance to set, 20 minutes or so into the baking time. Also, don't wait until the edge of the crust is perfectly browned before adding the shield; even with the shield it will continue to brown, albeit slowly, so add the shield while the crust is still a light golden brown.
Rolling pins
The rolling pin is a critical tool for shaping all kinds of baked goods, so it's important to have one that works well, and that you enjoy using. A good all-around size, for rolling dough on a counter or board, is a pin with a 10-inch barrel.
The most important part of a rolling pin is its barrel. Barrels are made from stainless steel, marble, non-stick aluminum, nylon, wood, composite, or even glass (an empty glass pin, designed to be filled with chilled water). Our favorite is heavy wood, or stainless steel; the weight of either takes much of the effort out of rolling. A pin that can be chilled before using (e.g., a marble or metal pin) will help keep the fat in piecrust and puff pastry from melting as you roll.
Another factor to consider is the pin's rolling mechanism. In some pins, the barrel simply rotates on a thin rod inserted through the center; on others, ball bearings help the rolling motion along. Ball-bearing pins give you a smoother “ride.”
